singer hand sewing machine manual

Singer Hand Sewing Machine Manual: A Comprehensive Guide
This guide offers detailed instructions for Singer hand sewing machines‚ covering threading‚ maintenance‚ troubleshooting‚ and manual access. Download free PDF versions!
Singer hand sewing machines represent a legacy of durable‚ reliable craftsmanship‚ offering a portable and accessible sewing solution. These machines‚ often favored for their simplicity and lack of electrical dependence‚ empower users with control over the stitching process. Manuals and updates are readily available online‚ ensuring continued usability.
Understanding your machine’s specific model and its components‚ as detailed in the manual‚ is crucial for optimal performance. Proper maintenance‚ including regular oiling with Singer Oil‚ extends the machine’s lifespan and ensures smooth operation.
Historical Overview of Singer Hand Machines

Singer’s journey with hand sewing machines began in the mid-19th century‚ evolving from treadle-operated models to fully manual versions. These early machines democratized sewing‚ bringing it into homes worldwide. The iconic Class 15 and models like the 99/99K‚ popular in the 1950s‚ exemplify this era.
Manuals from these periods demonstrate a commitment to user support‚ providing detailed instructions for operation and repair. Accessing these historical manuals offers insight into the machine’s design and enduring quality‚ ensuring continued use for generations.
Identifying Your Singer Hand Sewing Machine Model
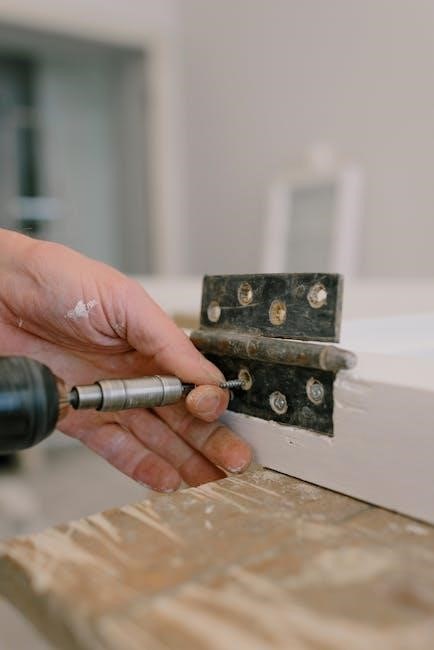
Locating your Singer hand machine’s model number is crucial for finding the correct manual and parts. Typically‚ a metal plate is affixed to the machine‚ displaying the model (e.g.‚ 99‚ 15-91). This plate often includes a serial number for precise identification.
Singer’s official website and third-party resources utilize these numbers to provide specific manuals and support. Accurate model identification ensures you access the correct instructions for threading‚ maintenance‚ and troubleshooting your particular machine.
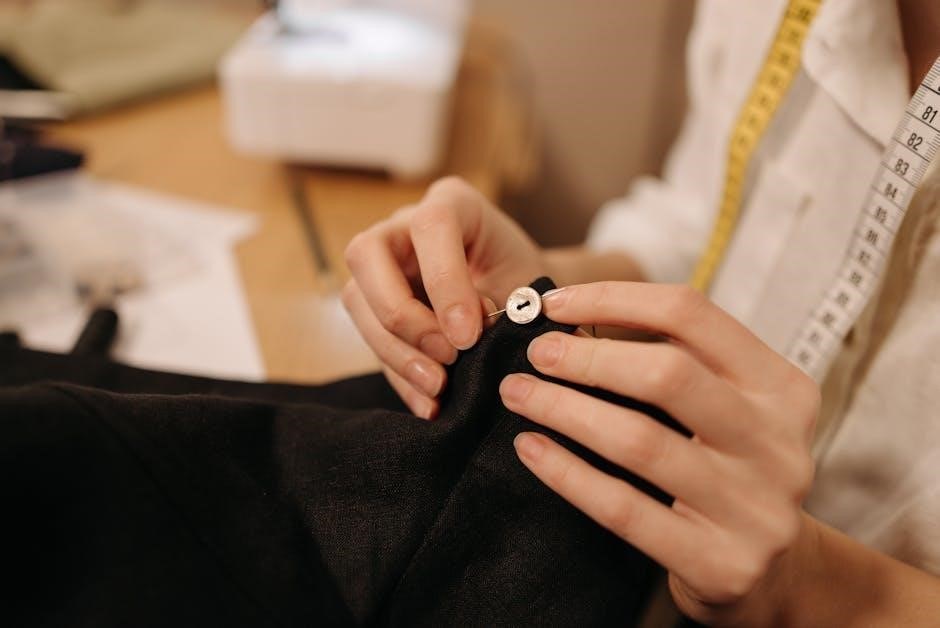
Understanding the Basic Parts of the Machine
Familiarizing yourself with key components is essential. The handwheel controls the sewing action‚ while feed dogs move fabric under the needle. A bobbin winder mechanism fills the bobbin with thread.
Essential parts include the needle clamp‚ presser foot‚ and tension discs. Understanding how these interact ensures smooth operation. Regular cleaning and oiling‚ using Singer oil‚ maintain functionality. Proper part knowledge aids troubleshooting and repairs.
The Handwheel and its Function
The handwheel is crucial for operating your Singer hand sewing machine. Rotating it drives the needle up and down‚ creating stitches. Controlled rotation dictates sewing speed; slower turns offer precision‚ while faster turns increase pace.
Always turn the handwheel towards you to lower the needle. Never force it if resistance is felt‚ as this could cause damage. Consistent‚ smooth rotation ensures even stitch formation and prevents mechanical issues.
The Feed Dogs and Fabric Movement
Feed dogs‚ located beneath the presser foot‚ are essential for moving fabric smoothly during sewing. These toothed metal pieces grip and advance the material with each stitch‚ ensuring consistent seam allowance.
Crucially‚ avoid manually pushing or pulling the fabric; let the feed dogs do the work. This prevents skipped stitches and uneven seams. Maintaining clean feed dogs is vital for optimal performance – remove lint regularly!
The Bobbin Winder Mechanism
The bobbin winder fills empty bobbins with thread‚ preparing them for sewing. Ensure you use bobbins specifically designed for your Singer machine – SINGER Class 15 transparent bobbins are recommended.
Proper winding is crucial for even stitch formation. Follow the machine’s instructions carefully‚ and avoid overfilling the bobbin. A correctly wound bobbin prevents thread nests and ensures smooth‚ reliable sewing performance.
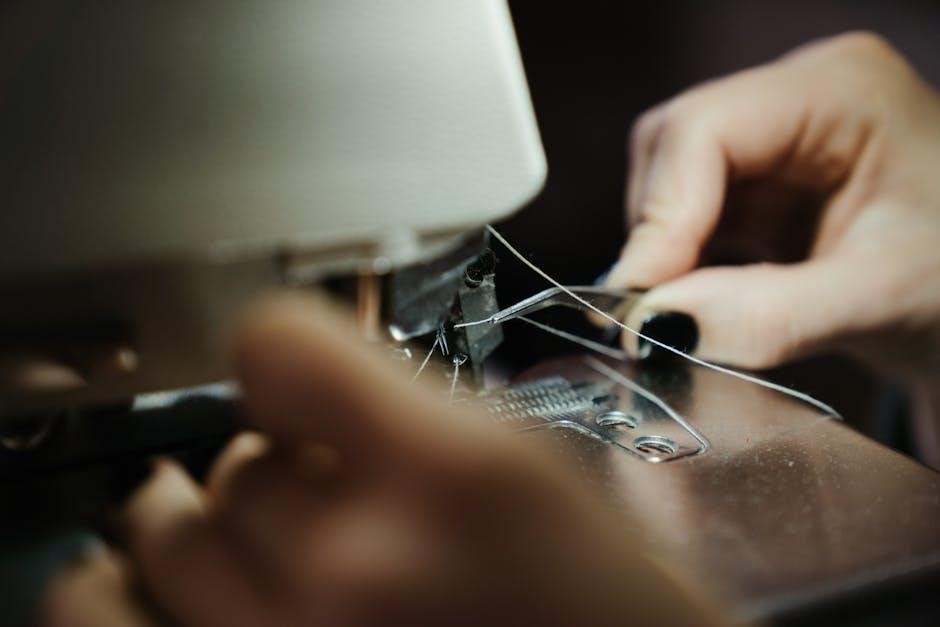
Threading the Singer Hand Sewing Machine
Correct threading is vital for proper machine operation. Begin by raising the presser foot and ensuring the needle is in its highest position. Follow the threading path illustrated in your machine’s manual‚ guiding the thread through each guide and tension disc.
Rethread completely if encountering issues; a misthreaded machine is a common cause of problems. Remember to properly seat the thread in the take-up lever for consistent stitch quality.
Step-by-Step Threading Instructions
First‚ place the spool on the spool pin. Next‚ guide the thread through the first thread guide‚ then down and around the tension disc. Continue by leading the thread up through the take-up lever and then down to the needle clamp.
Finally‚ thread the needle from front to back. Ensure the thread is securely seated in all guides for smooth operation. Refer to your manual for specific diagrams.
Correct Bobbin Winding Techniques
Begin by placing the bobbin on the bobbin winder spindle. Engage the bobbin winder by moving the lever to the right. Gently start the handwheel‚ guiding the thread from the spool onto the bobbin evenly.
Ensure consistent tension while winding. Once full‚ disengage the lever and remove the bobbin. Use bobbins matching your machine’s style for optimal performance‚ avoiding bent or damaged ones.
Troubleshooting Threading Issues
If your machine isn’t sewing‚ rethread it completely‚ ensuring the thread is seated correctly in all guides and tension discs. A common issue is incorrect threading. Verify you’re using the appropriate needle size for your fabric type.
Also‚ check for a dull or damaged needle; replace it if necessary. Avoid manually pulling the fabric‚ allowing the feed dogs to advance it smoothly. Consistent tension is key!
Needle Selection and Replacement
Choosing the correct needle is vital for optimal sewing. Select a needle appropriate for your fabric’s weight and weave. A bent‚ dull‚ or damaged needle causes skipped stitches and fabric damage; discard and replace it immediately.
Refer to the needle size guide for recommendations. Ensure the needle is fully inserted and securely tightened. Using the wrong size needle can lead to threading problems and machine malfunction.
Choosing the Right Needle for Your Fabric
Selecting the appropriate needle ensures clean‚ consistent stitches and prevents fabric damage. Lightweight fabrics require finer needles‚ while heavier materials need stronger ones. Consider the fabric type – knits need ballpoint needles to avoid runs‚ and woven fabrics work well with universal needles.
Always match the needle size to the thread weight. A larger needle creates bigger holes‚ suitable for thicker threads. Experiment to find the best combination for your project!
Replacing a Dull or Damaged Needle
A bent‚ dull‚ or damaged needle can cause skipped stitches‚ fabric puckering‚ and even machine malfunction. Discard the old needle immediately to avoid injury. Gently loosen the needle clamp screw and remove the old needle.
Insert a new needle with the flat side facing the back‚ ensuring it’s fully inserted and securely tightened. Regular replacement maintains stitch quality and prevents damage to your machine and fabric.
Needle Size Guide
Selecting the correct needle size is crucial for optimal sewing performance. Smaller numbers (e.g.‚ 60/8) are for fine fabrics like silk or chiffon‚ while larger numbers (e.g.‚ 90/14) suit medium-weight cotton.
Heavier fabrics like denim require even larger sizes (e.g.‚ 100/16 or 110/18). Using the wrong size can cause skipped stitches or needle breakage. Always test on a scrap fabric first!
Basic Sewing Techniques
Mastering fundamental techniques unlocks your sewing potential. Begin with straight stitching‚ ensuring consistent fabric feed – avoid manually pushing or pulling. Backstitching at the seam’s start and end secures the stitches‚ preventing unraveling.
Adjust stitch length for different fabrics and effects; shorter stitches for delicate materials‚ longer for heavier ones. Practice these basics to build confidence and achieve professional results!
Straight Stitching
Achieving a neat‚ consistent straight stitch is foundational. Ensure proper threading and needle insertion before starting. Gently turn the handwheel‚ guiding the fabric smoothly – never force it.
Allow the machine’s feed dogs to advance the material; avoid pulling or pushing. Maintain a consistent sewing speed for uniform stitch length. Practice on scrap fabric to refine your technique and build muscle memory!
Backstitching for Secure Seams
Backstitching reinforces seam beginnings and endings‚ preventing unraveling. After sewing a few stitches forward‚ briefly reverse the direction‚ sewing over the existing stitches. Repeat this process several times at both the start and finish of your seam.
This creates a secure anchor. Avoid excessively long backstitches‚ as they can weaken the fabric. Consistent backstitching ensures durable‚ professional-looking results‚ vital for garment construction.
Adjusting Stitch Length
Stitch length impacts fabric appearance and seam strength. Shorter stitches are ideal for delicate fabrics and curves‚ providing greater control and detail. Longer stitches suit heavier materials and quicker sewing‚ but may lack finesse.
Hand machines typically adjust stitch length via a dial or lever. Experiment with different settings on scrap fabric to determine the optimal length for your project. Consistent stitch length ensures a neat‚ even seam.
Maintenance and Oiling
Regular maintenance extends your Singer hand machine’s life. Oiling is crucial; a well-oiled machine operates smoothly and prevents wear. Use Singer Oil‚ specifically formulated for sewing machines‚ identified by the “Singer Red S” label.
Apply oil to all moving parts‚ following the machine’s diagram. Cleaning removes lint and debris‚ ensuring optimal performance. Neglecting these steps can lead to malfunctions and reduced sewing quality.
Importance of Regular Oiling
Consistent oiling is essential for a smoothly functioning Singer hand sewing machine. It minimizes friction between moving parts‚ preventing premature wear and tear. Neglecting oiling causes increased resistance‚ potentially damaging delicate components.
Regular lubrication ensures effortless fabric feed and consistent stitch formation. Properly oiled machines require less force to operate‚ reducing user fatigue. Refer to your manual for specific oiling points and frequencies.
Recommended Singer Oil Types
Singer specifically recommends Singer Oil‚ uniquely formulated for their sewing machines. This specialized oil ensures optimal lubrication and prevents gumming or residue buildup within the machine’s intricate mechanisms.
Avoid using general-purpose oils‚ as they may lack the necessary properties or contain additives that could damage the machine. Look for Singer Oil in tins clearly marked with the Singer Red S logo‚ guaranteeing authenticity and quality for long-lasting performance;
Cleaning the Machine
Regular cleaning is vital for maintaining your Singer hand sewing machine. After oiling‚ remove any excess oil with a soft cloth to prevent staining fabric. Use a brush to clear lint and dust from the feed dogs and bobbin area.
Avoid using harsh chemicals or solvents‚ as these can damage the machine’s finish or internal components. A clean machine operates smoothly and extends the lifespan of your valuable sewing tool‚ ensuring consistent performance.
Troubleshooting Common Problems
Encountering issues? A machine not sewing often stems from incorrect threading – rethread completely. Thread breaking can indicate a bent needle‚ wrong size for the fabric‚ or improper tension. Fabric jamming usually requires carefully removing the material‚ avoiding forceful pulling.
Always check the needle and bobbin for damage. Consistent problems suggest a need for deeper cleaning or professional servicing to maintain optimal performance.
Machine Not Sewing – Possible Causes
If your Singer hand machine isn’t sewing‚ first verify correct threading – a common culprit. A dull or damaged needle will also prevent stitching; replace it immediately. Ensure the correct needle size is used for your fabric type.
Crucially‚ avoid manually pushing or pulling the fabric; let the feed dogs do their job. Incorrect bobbin winding or an improperly inserted bobbin can also halt operation.
Thread Breaking Issues
Frequent thread breakage often signals a threading problem; re-thread the entire machine meticulously. A bent‚ dull‚ or damaged needle is a primary cause – discard and replace it with a new one. Using the wrong needle size for your fabric can also lead to breaks.
Ensure you’re using quality thread and that the bobbin is wound correctly and smoothly. Tension imbalances can contribute; consult the manual for adjustment instructions.
Fabric Jamming Solutions
If fabric jams‚ immediately stop and lift the presser foot. Gently remove the fabric‚ avoiding forceful pulling which can damage the machine. Never manually push or pull the fabric while sewing; allow the feed dogs to advance it.
Check for tangled bobbin thread or improperly threaded upper thread. Ensure the machine is clean and free of lint buildup‚ as this can impede fabric movement. Regular oiling also prevents friction-related jams.
Finding and Downloading Singer Manuals
Singer provides a dedicated website for manuals and machine updates‚ offering free PDF downloads of user guides and stitch guides for Singer‚ Husqvarna Viking‚ and PFAFF products. Numerous third-party resources also host Singer sewing machine manuals‚ with over 494 available for 50 models.
Access these resources to find your specific model’s manual quickly and easily‚ ensuring you have the information needed for operation and maintenance.
Singer’s Official Manuals Website
Singer’s official website hosts a comprehensive library of downloadable manuals and machine updates. This is the primary source for finding complete user manuals‚ stitch guides‚ and relevant updates for your Singer sewing machine.
Access this resource directly to ensure you receive the most accurate and up-to-date information for your specific model‚ guaranteeing proper operation and maintenance guidance.
Third-Party Manual Download Resources
Numerous websites offer Singer sewing machine manuals for download‚ providing alternatives to the official Singer site. Resources like The Manual Library host a vast collection‚ including PDF versions of older models like the Class 99/99K.
However‚ verify the source’s reliability to ensure the manual is accurate and corresponds to your machine’s specific model number before relying on the information provided.
PDF Manual Availability
Singer offers a substantial number of its sewing machine manuals in PDF format‚ readily available for free download. These PDFs encompass various models‚ including vintage and contemporary machines‚ ensuring accessibility for a wide range of users.
Downloading a PDF allows offline viewing and printing‚ providing a convenient resource for quick reference during sewing projects or maintenance procedures. Numerous third-party sites also host these PDFs.
Safety Precautions When Using a Hand Sewing Machine
Prioritize safety when operating your Singer hand sewing machine. Always exercise caution to avoid needle injuries; keep fingers clear of the needle’s path during operation. Handle the machine with care‚ ensuring a stable work surface.
If your machine includes a motor‚ adhere to standard electrical safety practices. Never force the machine; allow the feed dogs to guide the fabric. Regular maintenance contributes to safe operation.
Avoiding Needle Injuries
Protect your fingers at all times when using a Singer hand sewing machine. Maintain a safe distance between your hands and the needle during operation. Never attempt to sew over a broken needle – this poses a significant risk.
Always use the correct needle for your fabric type‚ and replace dull or damaged needles promptly. Avoid manually pushing or pulling the fabric‚ as this can lead to accidental needle contact.
Proper Machine Handling
Ensure your Singer hand sewing machine is placed on a stable‚ flat surface before use. Always operate the handwheel in the correct direction‚ as indicated by the arrows on the machine.
Avoid forcing any parts of the machine; gentle and deliberate movements are key. Keep the machine clean and well-oiled to maintain smooth operation. Store the machine in a safe‚ dry place when not in use.
Electrical Safety (if applicable ⎯ some hand machines have motors)
If your Singer hand machine includes a motor‚ always verify the voltage matches your power supply before plugging it in. Never operate the machine with a damaged cord or plug.
Ensure the machine is properly grounded‚ and avoid using it in damp environments. Always disconnect the power cord before performing any maintenance or troubleshooting. Do not attempt to repair electrical components yourself.